Accessing Files from a Mac or PC
How to Access Audio Files from WebShuttle Dictate
Normally, audio files recorded using WebShuttle Dictate are sent directly to the WebShuttle server over Wi-Fi or mobile data. However, in cases where there's a connectivity issue—such as poor Wi-Fi or no cellular signal—you can retrieve the audio files manually by connecting your device to a computer.
Accessing Audio Files from a Windows PC
Step 1: Download iTunes
If you don’t already have it, download and install iTunes on your PC.
Step 2: Connect Your iPhone
Use a USB cable to connect your iPhone or iPad to your computer. Wait for it to appear in iTunes.
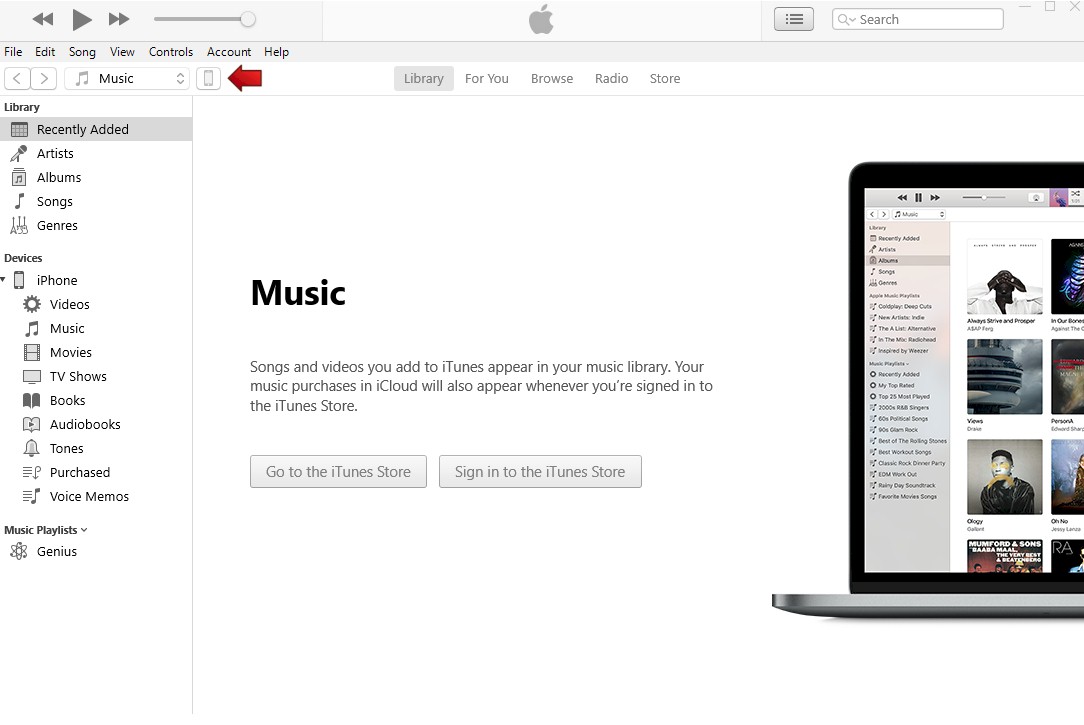
Step 3: Open Device View in iTunes
Click the small phone icon that appears in the upper left of the iTunes window.
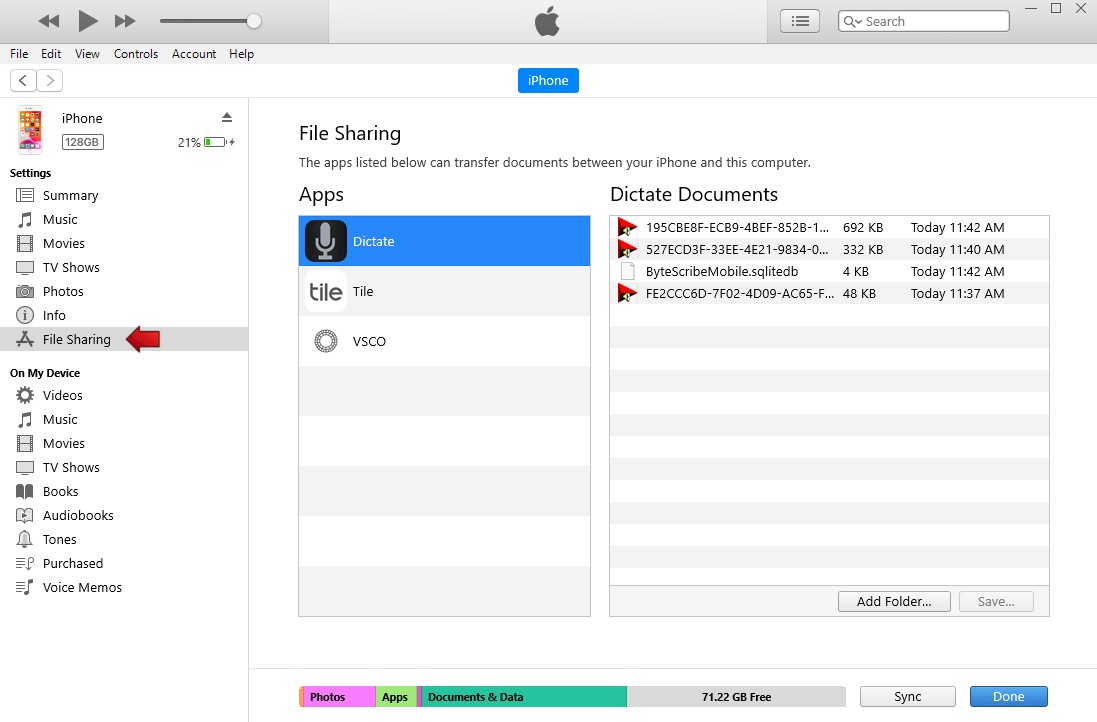
Step 4: Go to File Sharing
Select File Sharing from the sidebar, then click on the WebShuttle Dictate app from the list of apps that support file sharing.
Step 5: Drag Files to Your Desktop
Select the audio files listed and drag them to your desktop or another desired location on your computer.
Accessing Audio Files from a Mac
Step 1: Connect Your iPhone or iPad
Plug your device into your Mac using a USB cable.
Step 2: Open Finder
Once your device is detected, open a new Finder window.
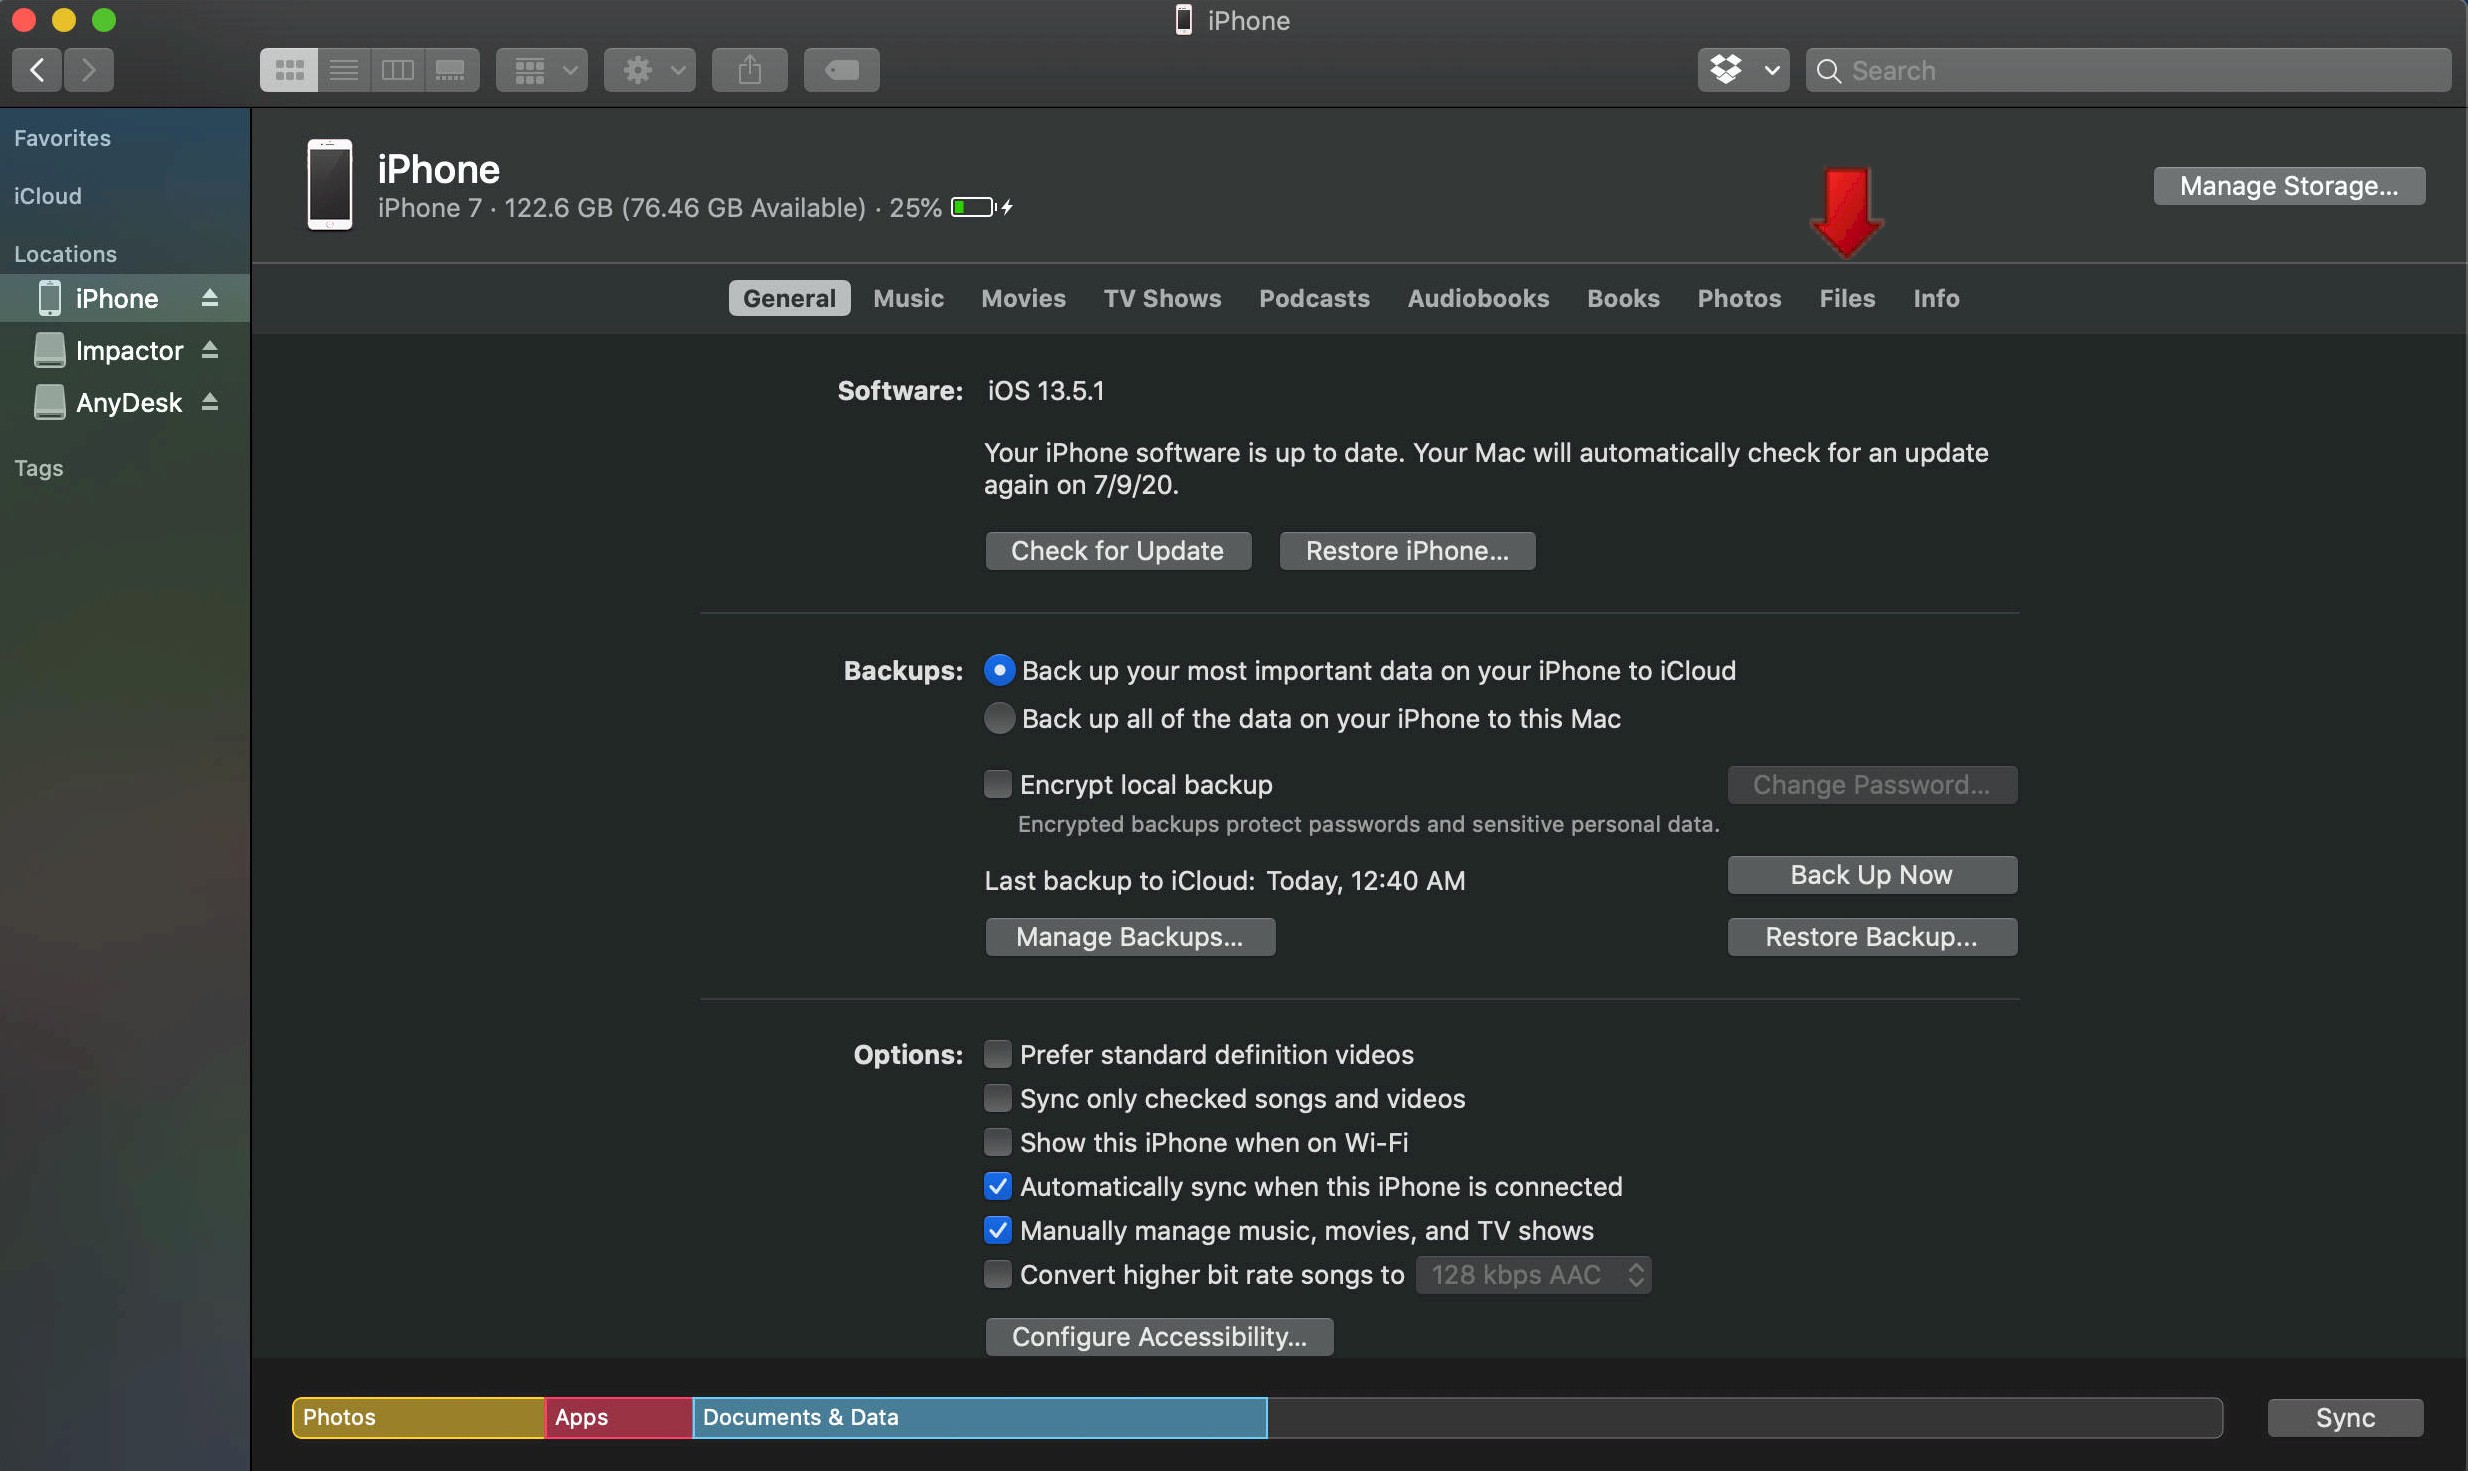
Step 3: Select Your Device
Your iPhone or iPad should appear in the left sidebar under "Locations." Click it.
Step 4: Navigate to the Files Tab
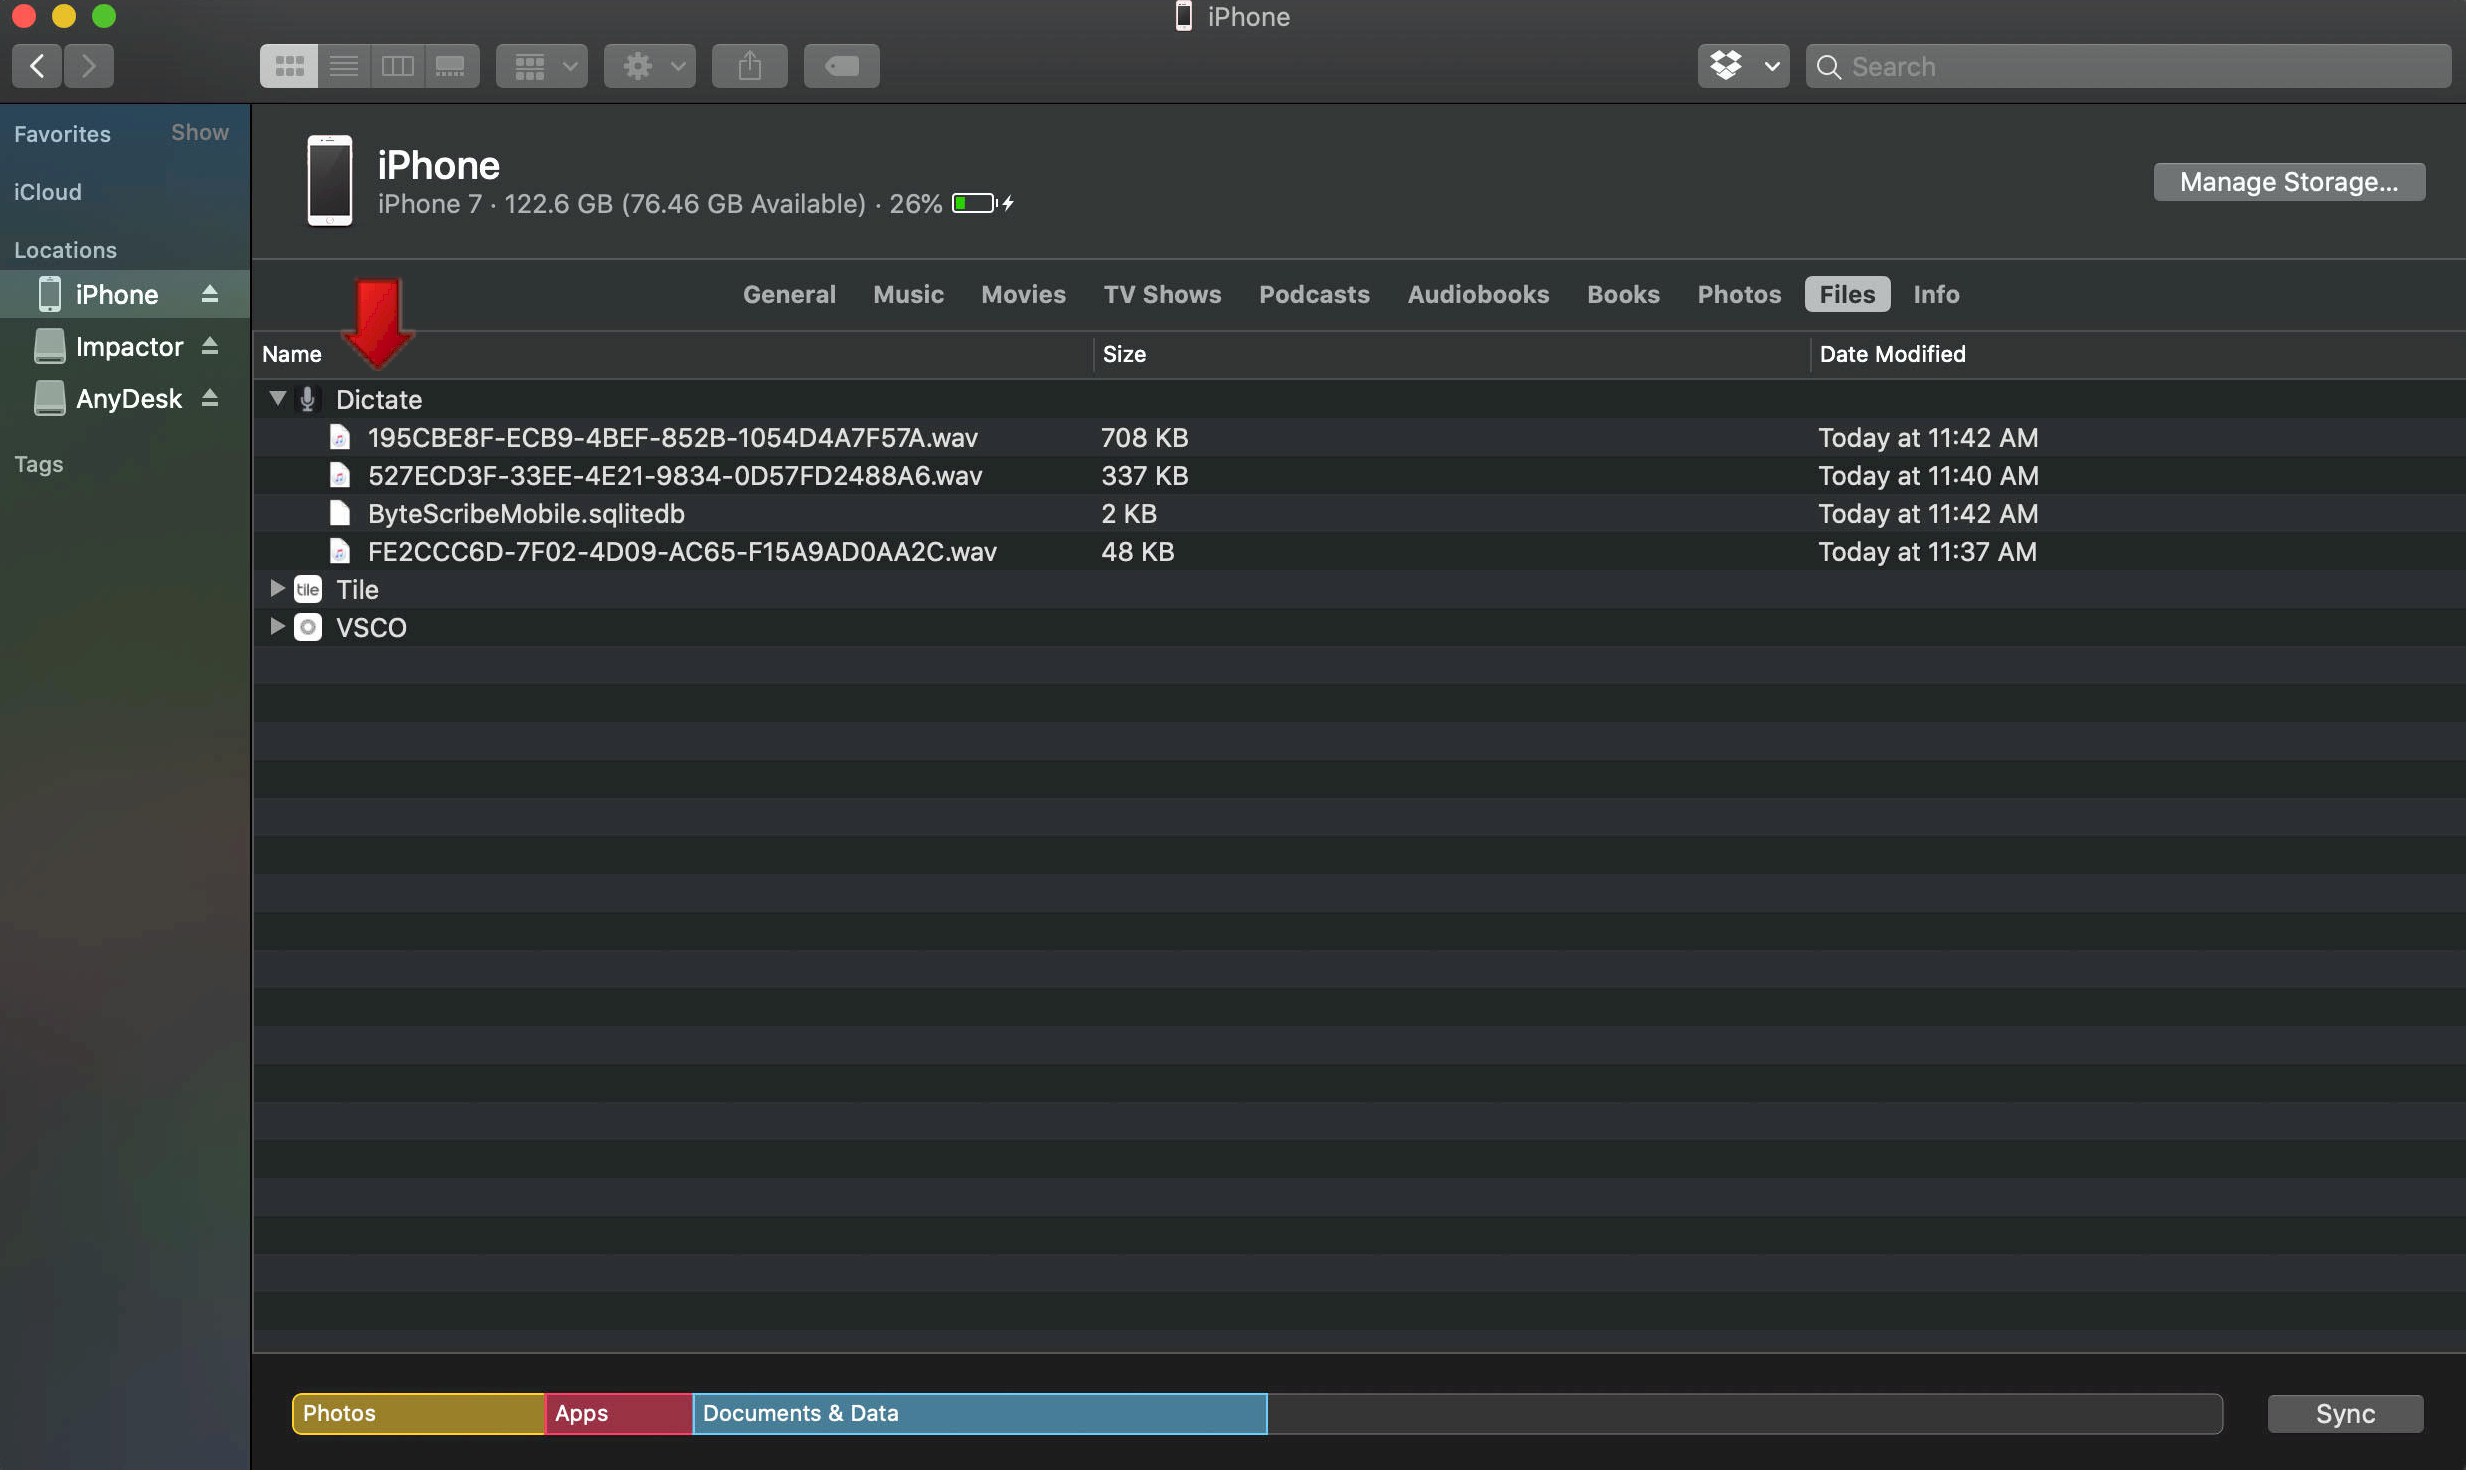
Click the Files tab at the top, then locate and select the WebShuttle Dictate app.
Step 5: Drag Audio Files to Your Mac
Drag the audio files to your desktop or desired folder to save them locally.
Tip: After retrieving files, you can manually upload them into VEHRDICT or provide them to your transcriptionist. Always delete transferred files after confirming they are backed up to avoid duplicates.
Would you like this exported as a PDF or added to another page?


