Accessing Files from a Mac or PC
How to Access Audio Files from WebShuttle Dictate
Normally, audio files recorded using WebShuttle Dictate are sent directly to the WebShuttle server over Wi-Fi or mobile data. However, in cases where there's a connectivity issue—such as poor Wi-Fi or no cellular signal—you can retrieve the audio files manually by connecting your device to a computer.
Accessing Audio Files from a Windows PC
Step 1: Download iTunes
If you don’t already have it, download and install iTunes on your PC.
Step 2: Connect Your iPhone
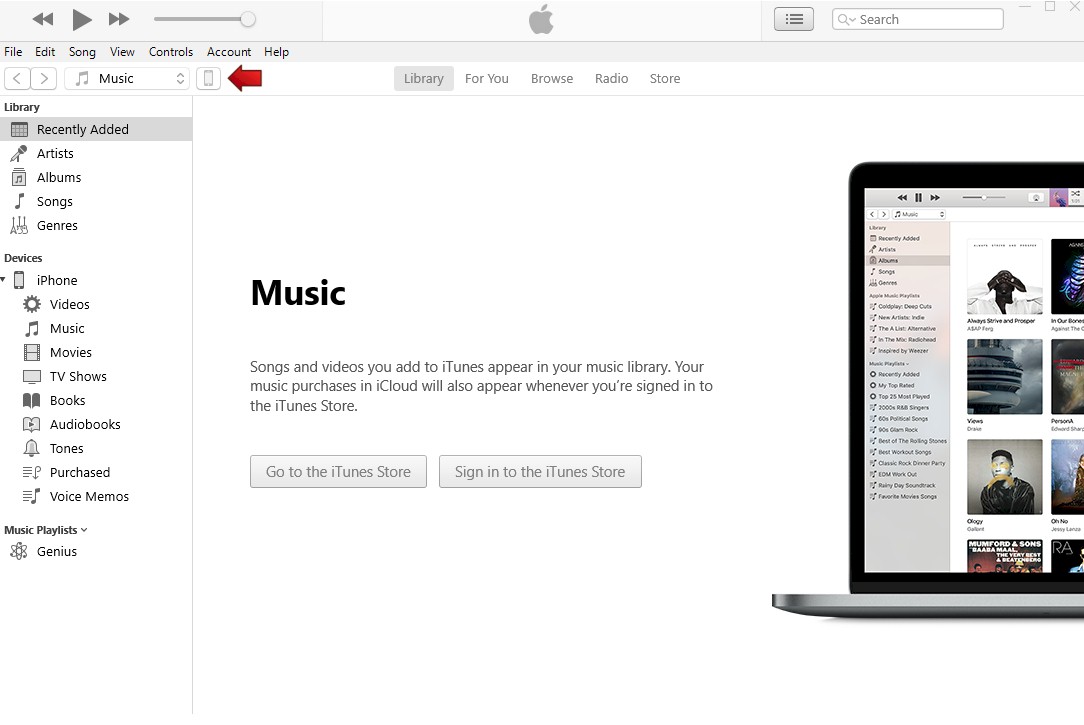
Use a USB cable to connect your iPhone or iPad to your computer. Wait for it to appear in iTunes.
Step 3: Open Device View in iTunes
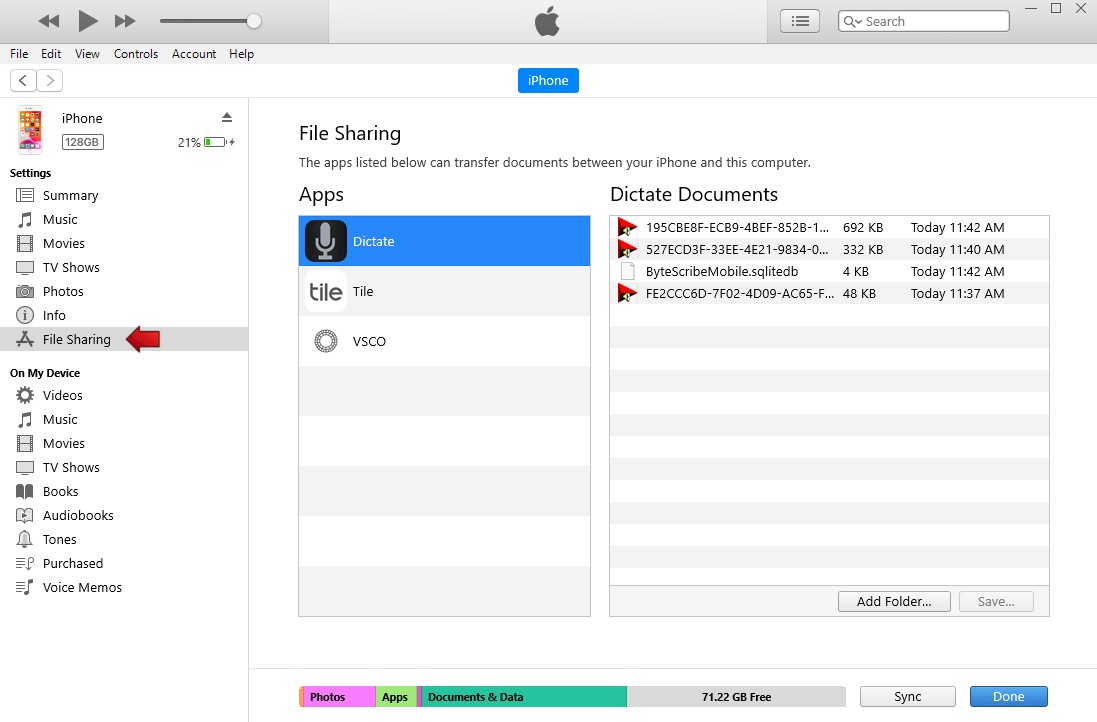
Step 4: Go to File Sharing
Step 5: Drag Files to Your Desktop
Select the audio files listed and drag them to your desktop or another desired location on your computer.
Accessing Audio Files from a Mac
Step 1: Connect Your iPhone or iPad
Plug your device into your Mac using a USB cable.
Step 2: Open Finder
Once your device is detected, open a new Finder window.
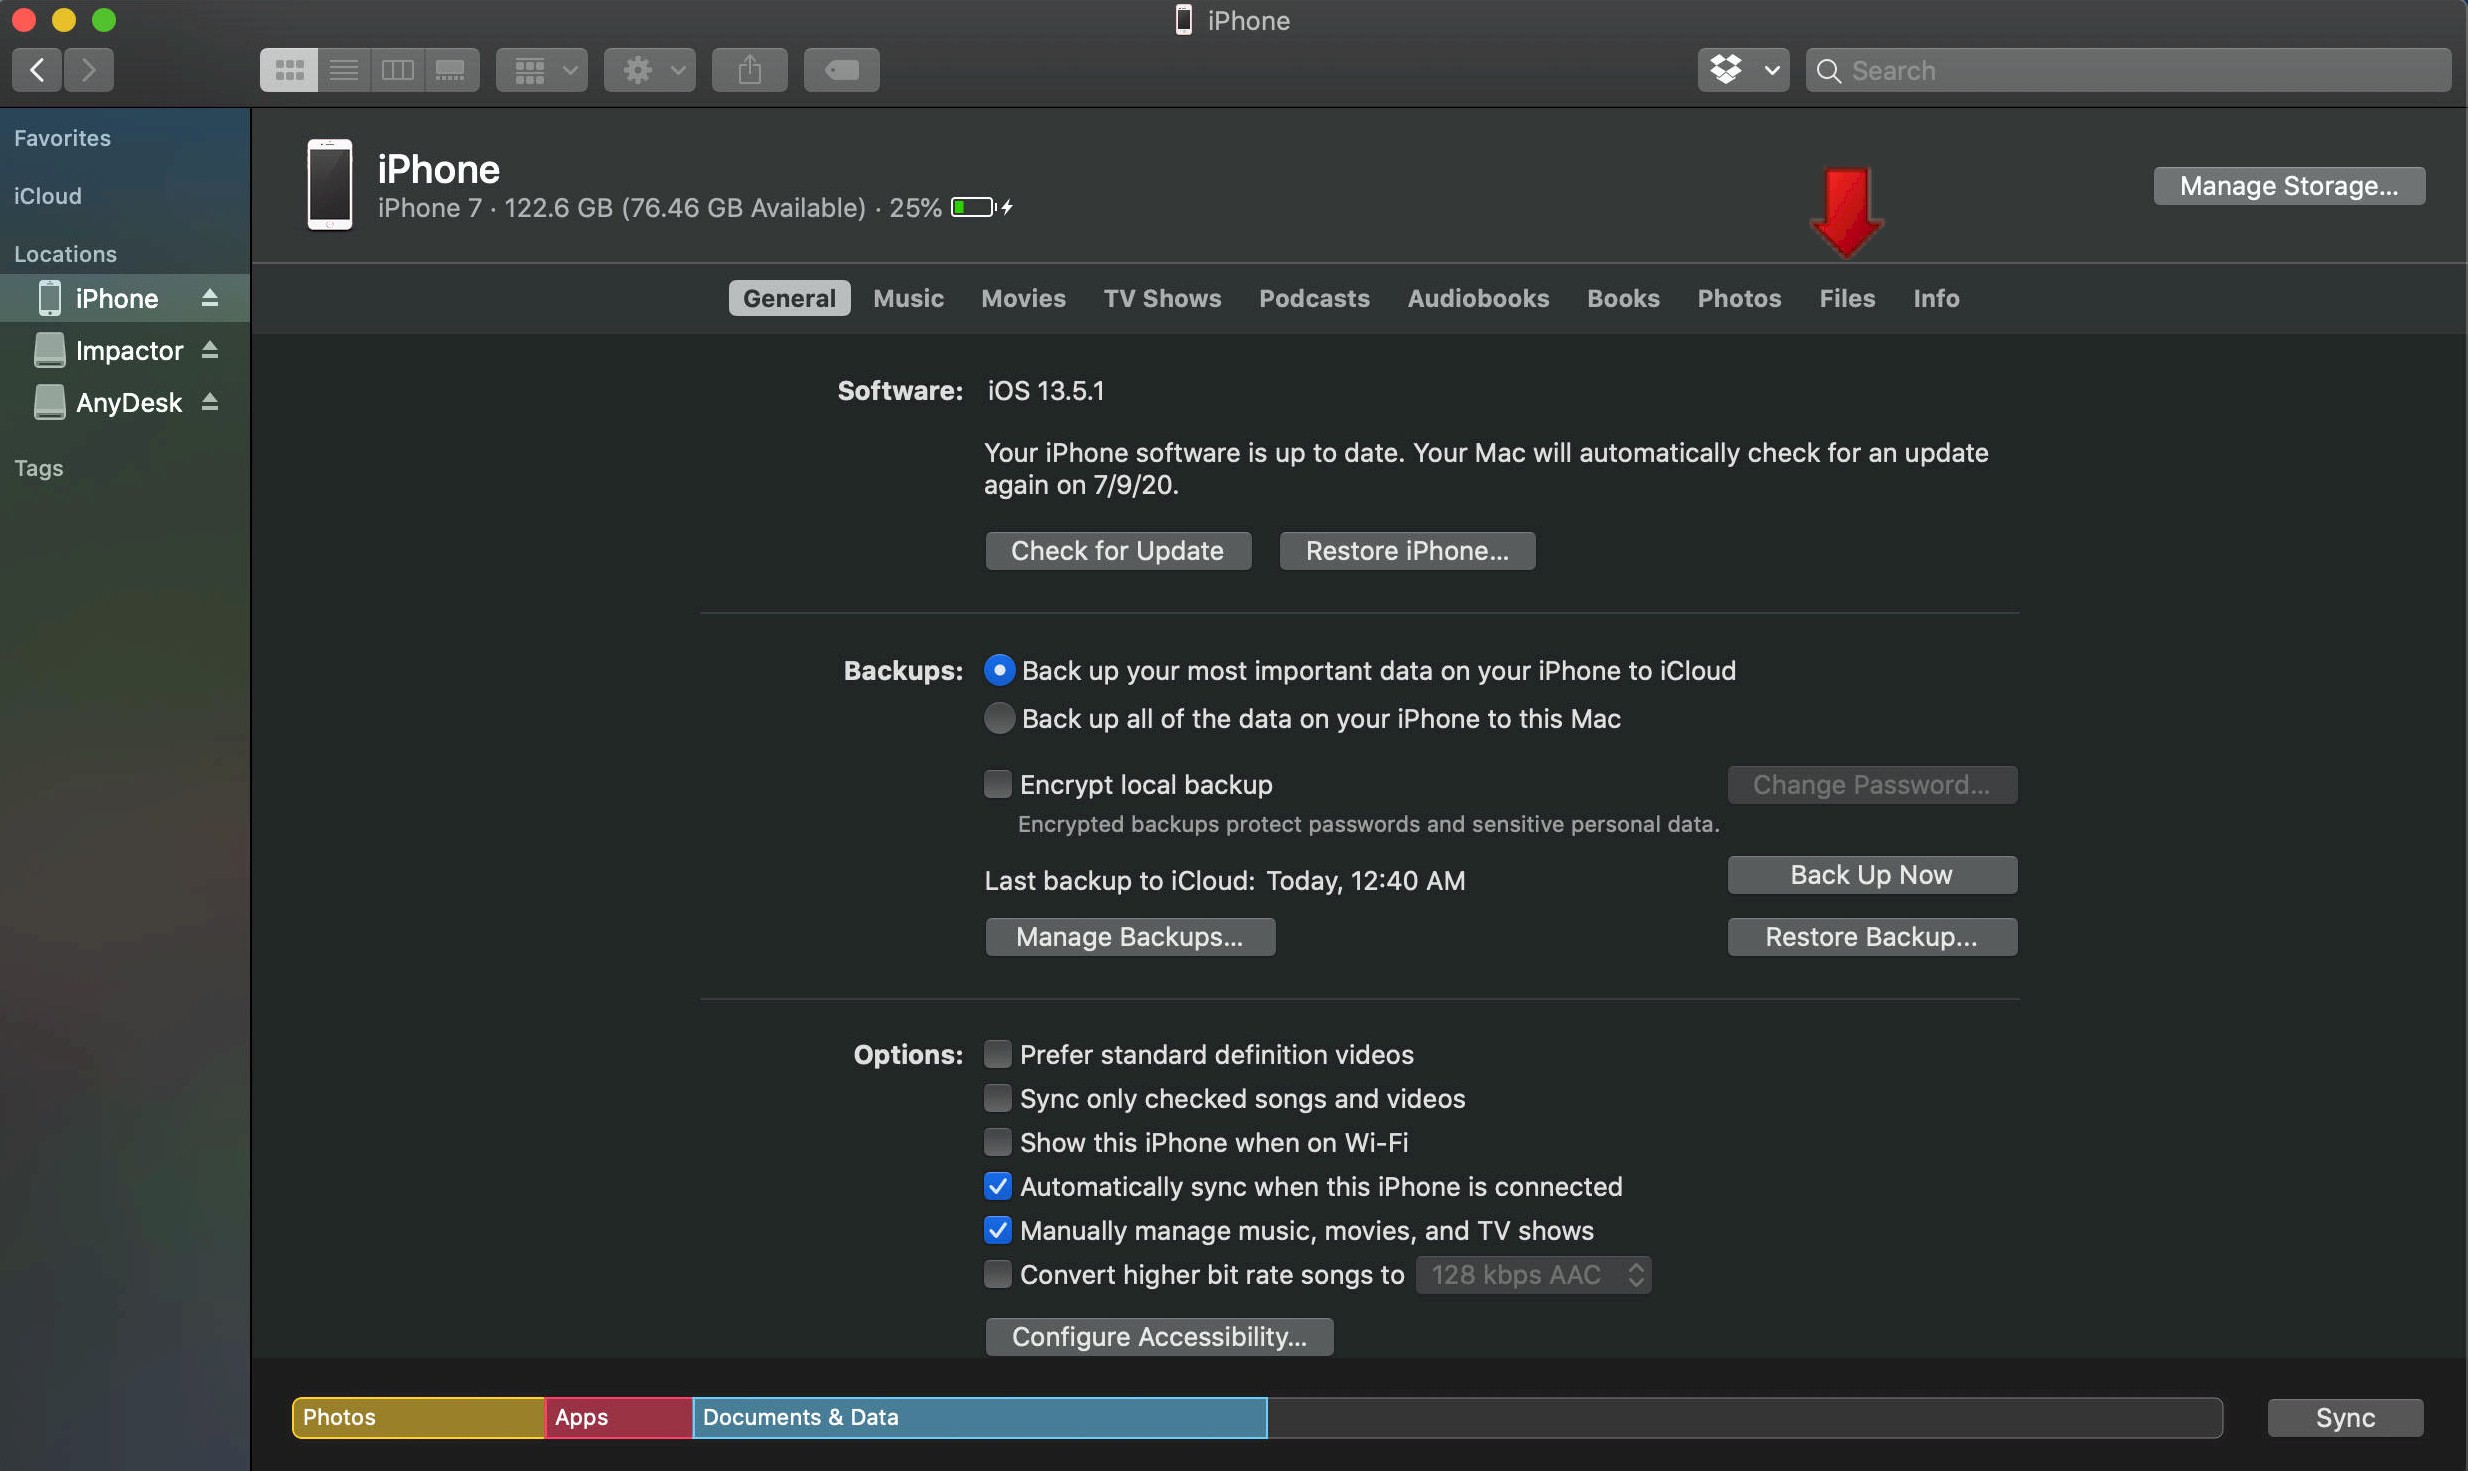
Step 3: Select Your Device
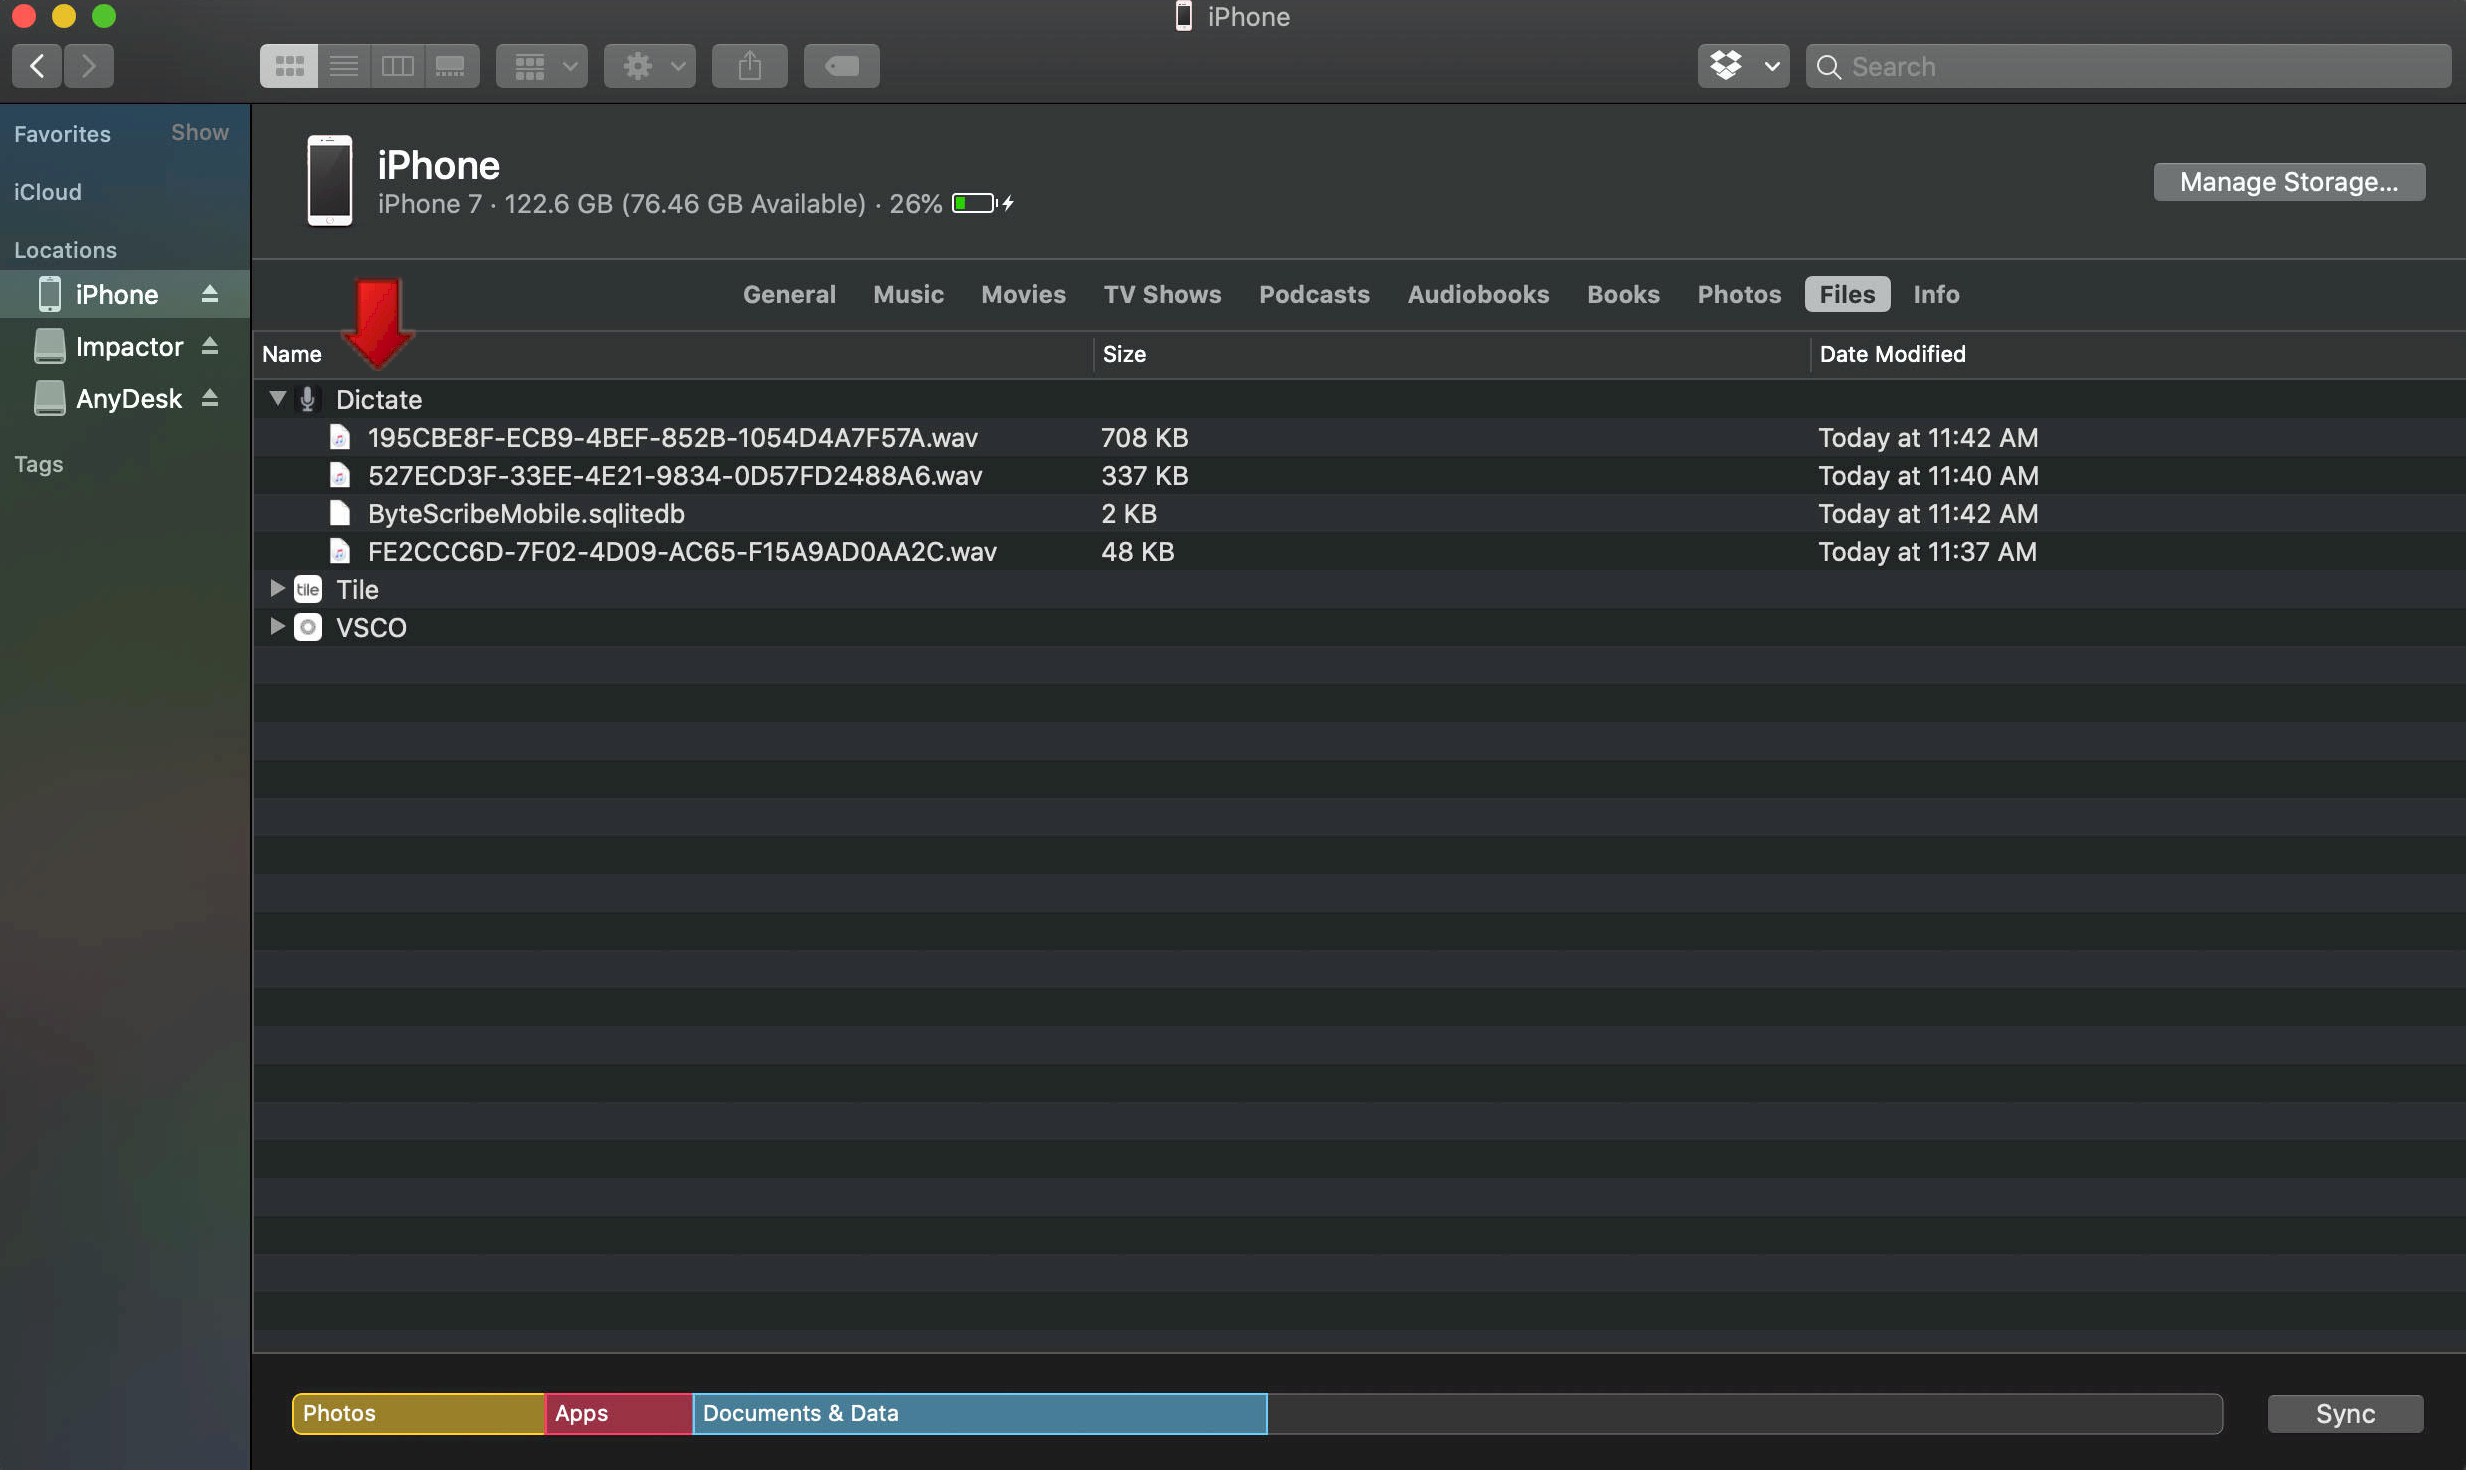
Step 4: Navigate to the Files Tab
Step 5: Drag Audio Files to Your Mac
Drag the audio files to your desktop or desired folder to save them locally.
Tip: After retrieving files, you can manually upload them into VEHRDICT or provide them to your transcriptionist. Always delete transferred files after confirming they are backed up to avoid duplicates.


